Say Yes to the Dress

Ali is going to be in her first wedding in May, where she will be Gina’s flower girl.

Yes, a two year old flower girl.

Before she was engaged, I had told Gina that anyone was crazy who wanted a two-year-old flower girl – that you have NO control over what a toddler will do or not do in a wedding, and it was way to stressful to attempt.

But I, being a good friend, acquiesced, but only after making Gina sign a 687 page disclaimer and complete release of liability if my toddler were to ruin her wedding in any way.

And I have to admit, it really is a fun and exciting experience.

And plus, it guarantees to provide a few good blog posts.

So today was the day to go try on flower girl dresses. I’ve been hyping it up to Ali for a week, telling her how fun it would be to try on pretty pretty princess dresses. But, accessory queen though she may be, she’s not really interested in dressing up yet, so she’s been somewhat indifferent at the idea.

This morning at breakfast, Chris asked her excitedly, “Are you going to try on pretty pretty princess dresses this morning?”

Ali answered with a very uninterested-adult-sounding, “eh.”

But you never know what will motivate a two year old. We drove up to the store, and she started squealing, “Store with a little heart on it!!”
And from then on, she was elated that she was going to get to go into the store with a heart as an apostrophe.

Go figure.

Then, once we got inside and she saw the mirrors and pedestals and pretty dresses, well, she was sold.
THEN we went to the flower girl section, and she was too thrilled to find “HATS!!!”.
One wasn’t enough. She had at least four shoved on her head.
But anytime that she saw a bride come out, she stopped everything in awe of their pretty pretty Princess dresses.
So we gathered up dresses and put the first one on. She was speechless, as was I.
She daintily walked around like a true princess, holding her “hat” on very voraciously.
After peering at herself for quite some time, she was thrilled and told the consultant, “Ali is BEAUTIFUL!!”
Then we tried on Dress #2, and it was the definite and unanimous choice. Instant Magic:
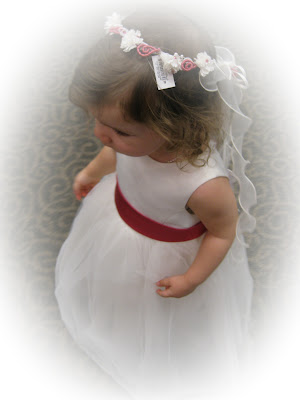
The Bride was happy,
and all four Ali’s were happy.
Although she was insistent on wearing her hat backwards,
Even though she kept having to pull it’s “bangs” back.
We tried on Dress #3 to just make sure that we were ready to “Say Yes to the Dress”.
When we asked Ali if she liked this dress or the other dress best, she decisively said, “The other dress!!”
But even though she was completely enamored with her own beauty, she still paused to watch any new brides.
We had a perfectly dreamy and romantic girl time (on Valentines, no less!), and Ali definitely enjoyed being the pretty pretty princess.
While we were driving away, I listened to her repeating to herself over and over, “Ali was beautiful in pretty pretty dress. Daddy will say Ali is beautiful.”

Art Class From an Art Ignoramus

So the other day when I posted about my recent experimentation in the world of painting, I had just as many comments about the photo of the Celtic knotwork as I did about the painting, so I decided that I would teach y’all how to do it.And I DO expect you to go get the supplies and follow along.

Immediately.

Okay, okay. You can keep reading without your supplies.

Here’s the thing about Celtic knotwork: It is MUCH easier than it looks. It is all about knowing how to do it. I have tried and believe that it is literally impossible to draw even the simplest celtic knot freehand.

Now granted, I have no artistic abilities, but I would say it would be hard for nearly anyone.

However, with just a little direction on how to go about the recipe of Celtic knotwork, it is surprisingly simple.

I am sure that there are dozens, maybe even hundreds of websites with more exacting and correct instructions than the ones I’m about to give you, but I figure that maybe if an art simpleton gives the instructions, they’ll be simple enough to make anyone want to try them.

So, to start out, it’s easiest to do on graph paper. So if you have some handy, grab your graph paper and a pencil.
Don’t worry – we’re only going to use a small portion of that page of graphing beauty.

If you don’t have graph paper, then a ruled piece of paper would be the next best thing.

Okay, now that you’re back with your supplies, make very faint dots at every other corner. Let’s start small and do five dots on the first row. Then go to the second row and do every OTHER corner that you didn’t do on the first row.
Continue until you have nine rows. Be sure to make the ending rows the shorter pattern (see how the top and bottom row above have five dots, while the ones next to them have six).

Now it is time to start drawing your ropes. To be simple, start with the second row. Draw diagonal ropes going in the same direction (left to right, if you’re copying mine) around each dot, and almost to the dots above and below it.

Then skip a line of dots and do the same thing on the fourth row. So far it should look like this:
Now I was actually erasing my dots as I drew my ropes to make it easier to get rid of them. This might make it more difficult on your first time, or to visualize what I was doing, so here is a picture of a different rendition with the dots still in the middle:
It might help to leave the dots the first time (oh, and ignore what is going on in the middle of that picture – that’s on down in the lesson.).

Okay – so do the left to right ropes on the second, fourth, sixth, and eighth rows, or every other row:
Now it’s time to go the other direction on the rows that are still left. Start on the THIRD row. This time, take care to draw your ropes up to, but not crossing your previous set of ropes, so after doing the third row, it should look like this:
Go ahead and follow through on all of the odd numbered rows except for the first and the last:
After getting all of these middle ropes in, go back and “clean up” a little – i.e. attach your first set of ropes to the second, and just make it look a bit neater:
Now is where it all comes together. follow the pattern through the outside rows and attach the sides to each other. This is hard to explain, but basically look at all the sides, identify the hanging rope ends, and attach them to each other, all except for the ones on the corners:
Then go back and tie up the corners. You can be creative and artsy with the corners (or with the sides, for that matter) – finish them off however you would like. Here’s how I usually finish mine out:
Okay – so that’s the basic idea.

But how about if you want to leave an opening in the middle like I did with the crosses in my first picture?

When you first do your dots, trace out the area that you want to leave open by putting a dash through the dots:
Then do all of your lines as normal, except don’t do them on the dots that you dashed:
And when you do your tidying up, you can get a bit creative with how you tie up your middle ends (sorry that this isn’t the neatest one ever – I had a toddler needing my attention):Once you’ve drawn a couple on graph paper, try doing it on regular paper. You just need some way to evenly space out your dots, whether by putting a graph paper under your paper, or by using a ruler. But once you have the dots, you don’t need the graph paper.

If this is completely confusing and un-followable or you have any questions, let me know!

Good luck! I can’t wait to see your designs!! If anyone actually attempts to follow my instruction, please send me pictures of your work and I’ll post them – like a proud Kindergarten teacher!!

Say it Forward Friday: Christie and Deidre

Mom Blogs

I want to use this Say it Forward Friday to introduce you to a brand new blogger and my good friend, Christie. Her husband, Jarrod, has been blogging for a while, but Christie decided that she wanted to start a blog to chronicle her boy’s lives.

I have been amazed at Christie’s natural talent for blogging. She is already writing as if she has been blogging for months!!

I am suspicious that she has been writing a fake blog to get up to speed and now is wowing us with her secret experience.

But if that’s not true, I suppose some of her author-husband’s skillz have been rubbing off on her.

Christie and Jarrod are in our small group, and so you may remember some of my posts about them, including duking it out during small group, or my giveaway for Jarrod’s books.

Welcome to the blogosphere, Christie!!


I would also like to give you a tip to another awesome blog, Deidre. She is also in our small group (since I’m all about a themed Say it Forward Friday and all).

Deidre’s blog chronicles the miraculous journey of their precious daughter Kendall’s adoption, which was finalized last year. Kendall is from Guatemala, and is a beautiful almost-two-year-old that we all prayed to get here for a LONG time. Her story is a great one to read!!

AND they are currently in Orlando introducing Kendall to Disney World, so I completely expect a really great blog post with lots of new pictures sometime next week. Or, for that matter, sometime this weekend after Kendall goes to bed. Not to pressure you or anything.

These are both really great blogs – be sure to check them out by clicking on their names, and leave them a comment, letting them know you stopped by!!!

To see everyone else’s Say it Forward Friday posts, be sure to go to 5 Minutes for Mom.

Pink is the New Blond

So on this season of American Idol, there have been a lot of Pink-Haired singers. Not completely pink-headed, mind you, but just with “tasteful” pink highlights:
I realized last night during eliminations that I have been subconsciously cheering for all of the pink-haired people, and have been disappointed when they’ve gotten eliminated.

I guess I like pink highlights.

I mean, they are pretty cool looking, in a funky sort of way.

Especially since I’ve never had a drop of hair dye on my hair. Ever.

I asked Chris last night if I could get some. He said I could do anything I wanted as long as I didn’t cut my hair. If it took pink highlights for me to be happy having long hair, then he was fine with it.

So. . .

I had to see what I would look like.
At the moment, Ali is smudging fingerprints all over my computer screen excitedly saying, “Mommy with pink hair!!!”.

Many Mini Valentiners

We had a Valentine Card Making Party for toddlers at our house today. I aprepared for complete and utter mass chaos, but it went very well! .

There were 8 toddlers from 1-4 years old, 5 Mommies, and at least 56,782 foam stickers, most of which miraculously stayed on the table or on the cards.

Our esteemed guests included Averi,
Michelle,
Titus,
Joshua,
Hannah,
and Mia and Josiah.

We wisely let them play for a while to start with to deplete some of their energy resources.
Then the fun began. We had just enough table space to let all 8 kids sit around the tables, while us Mommies hovered and helped and kept them from sticking stickers to their eyes or to their neighbor’s hair.
This craft amazingly kept their attention for around an hour, in which each kid made several cards each and between all of us we made QUITE the mess:
Here’s Mia and Ali clutching tightly showing off their card collections:
Then we had some more play time to further prepare them to have awesome naps.
Ali and Averi had some bonding time:
Averi discussed the philosophical implications of her book while Ali was more interested in studying her cookie:
Ali showed all of her friends how to make “silly hair” out of her shakers, which was quite a hit.
And, as everyone was leaving, one forlorn little Valentine stood at the window, wishing it didn’t have to end so soon:

History 101 of the Teenage Jean Mutilation Epidemic.

Why do I blog about blue jeans so much? I guess I better create a category just for all of my denim drama.

Every generation of teens have their own unique methods for mutilating blue jeans. MUCH to the chagrin of their parents, who just spent money to buy them perfectly new and good jeans.

In the 80’s, it was to rip holes in them. Especially strategically placed holes. Which kinda gave away that they were ripped and not “accidental”.

In the 90’s (my era of teen jean mutilation – which I wasn’t allowed to participate in), it was slitting the sides of the bottom of the jeans (you know, so that our Timberland boots could fit easier. I wonder whatever happened to my Timberlands. . .)

In the late 90’s, it was writing all over one’s jeans. Or having one’s friends write all over jeans so as to look the maximum amount of cool and popular.

Now that we’re in the 00’s, there are a lot of jean mutilation trends out there, but there is one that I am not sure is actually practiced, or if jeans are bought pre-mutilated only, but I decided to take part in it anyway.

Maybe since I wasn’t allowed to mutilate my jeans as a teenager.

You know, working out all of that pent-up rebellion that I have. I think I might just stay out till midnight and jump on a trampoline and watch “You Can’t Do That on Television” while I’m at it.

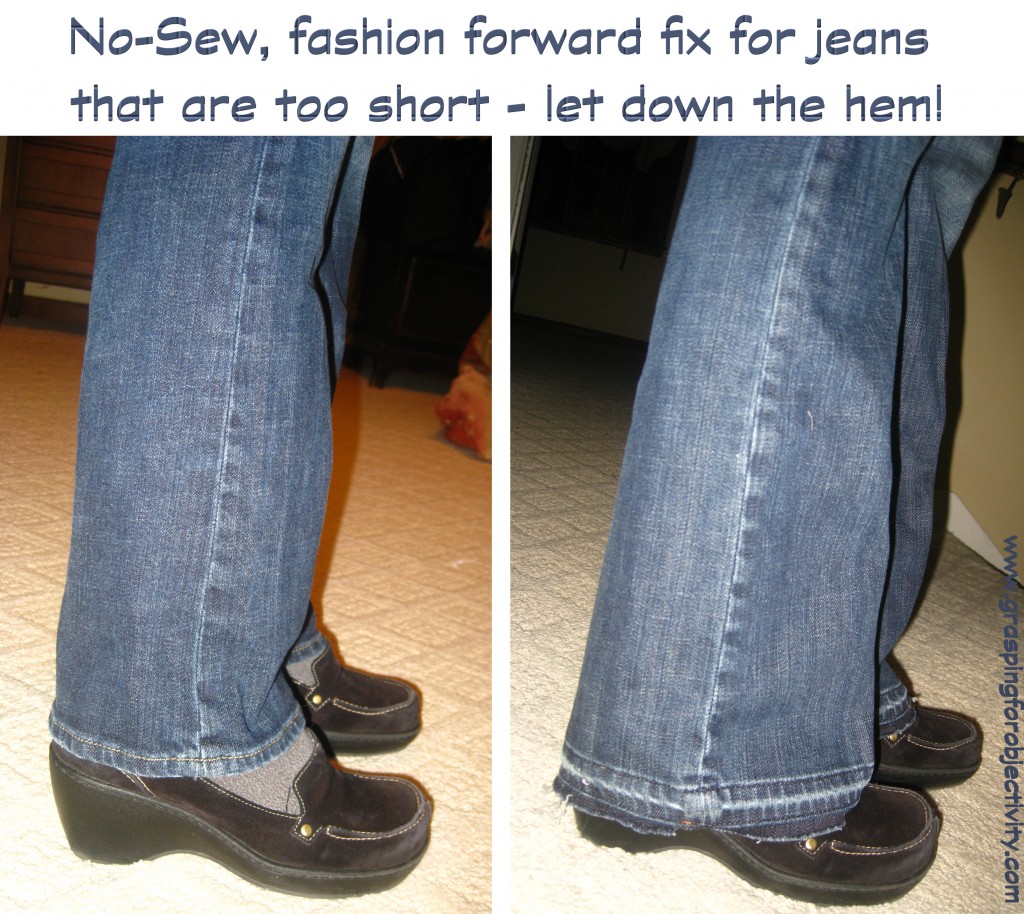
Anyway, back to jean mutilation: I tried ripping out the bottom hem of my jeans.

I hear the gasps of horror at my rebellion now.

You see, I have a few pairs of Express Jeans that when I bought them, they were just barely the right length (I am just at that terrible height where regular jeans are either JUST RIGHT or slightly too short, but Longs would stretch all the way back up to my knees).

However, I don’t know if it was shrinkage from washing, if I’m getting taller, or if the expanding of my hips took up some length (hopefully the first hypothesis), but one day I caught a glance of myself in a full length mirror and realized that my jeans were at that very awkward length. Just a weeee bit too short.
Ick.

This traumatic moment is what led to me buying my most recent jeans, which as I already told you brought troubles of their own.

So, I took one of my pairs and tried a grand mutilation experiment. I ripped out the seams, then ironed them down really good.

However, since I pretty much never iron (I thank my husband regularly for wearing shorts and t-shirts to work – yes, shorts even in the wintertime. Unless it is under 40 degrees. That is his OFFICIAL cut-off. Then it’s jeans. But at any rate, I never have to iron), I had absolutely NO idea where my ironing board was, so I just decided to do a quick ironing job on the carpet in our dressing room.

Bad idea.
It actually MELTED the carpet.

Yes, in two places. I know, I should have realized it was melting on the first leg, but it’s not like I check the surface that I’m ironing on to make sure that it didn’t melt. I MEAN, who in their right mind made carpet meltable?? Don’t they know it should be an ironable surface??

Gee.

So besides my ironing issues, I loved my jean’s new look:
It gave me just enough length to fix the awkward shortness and really make them the perfect length. AND it adds more visual interest to the jeans.

Now I’m not sure what is going to happen after a couple of washes, seeing that there is now NO hem at all. I may have to go back and somehow manage to do a very small hem (however, with my atrocious sewing abilites, don’t count on it), or if any of you have any better ideas, I’m all ears.

So, to recap this all-important blog,

Dweeby-I’m-a-nerd-that-has-an-accounting-degree-length:
Cool-I’m-not-really-27-years-old-length:
I know. My blog posts are so thought-provoking and life-changing.

Next on the list of Denim Drama posts: The technical differences between cool jeans and Mom Jeans – what makes a Mom Jean a Mom Jean. Be on the lookout – posted Monday, March 2nd.